Efficient Flash Techniques
It's getting to be that time of year when I need to prepare for the Skills Canada animation competition. It basically is a one- or two-day event (depending on the level) where you have to create a short animation based on the given prompt. A fully-developed plot is a requirement, which means the video has to be long enough to tell a story, which means the animation needs to be created very quickly. After a few years of doing this competition, I have developed some strategies to make my animation as quick and efficient as possible while still leaving room to be improved and perfected if there is extra time at the end.
I should note that these techniques are by no means my opinions on what "good" animation should be. I simply came up with these as ways to be a little lazy in order to save time.
I'll start off with the basics and then progressively work towards more specific techniques.
1. Skip every x frames
Generally speaking, you can skip a few frames when doing frame-by-frame animation without negative consequences. A drawing can stay onscreen for more than one frame in a sequence.
I typically animate at 24 frames per second, but I always begin by only drawing the keyframes, which are the main poses. I then create a blank keyframe between the two main ones, turn on onion skin, and draw in between the lines to create an in-between keyframe.
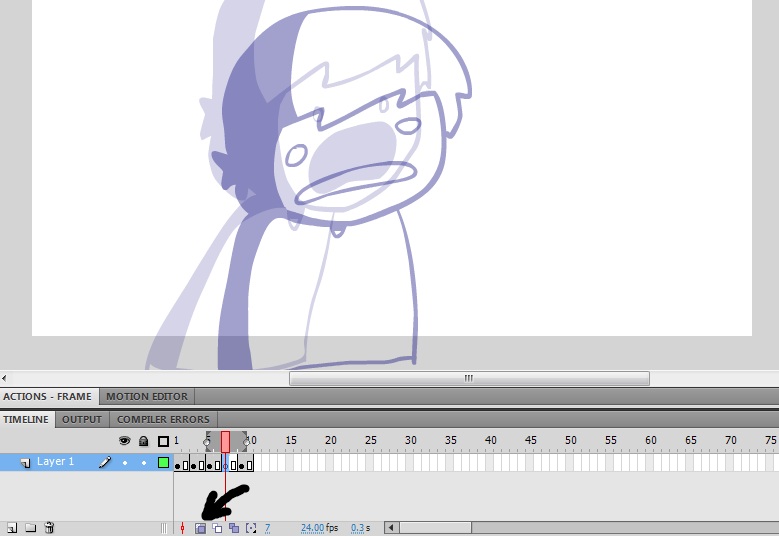
Drawing in-betweens with the Onion Skin option selected and every second frame skipped.
The benefit of this method is not just that it saves you lots of drawing, but also that it allows you to go in and fill in the skipped frames later. However, if it still takes too long to redraw this many frames, there are other options.
2. Add a "bounce" between two poses
If you don't have time to draw your own in-betweens, it can be effective to just have two poses with some stretch and scale transitions between them. I often make characters bounce from one pose into another like so:
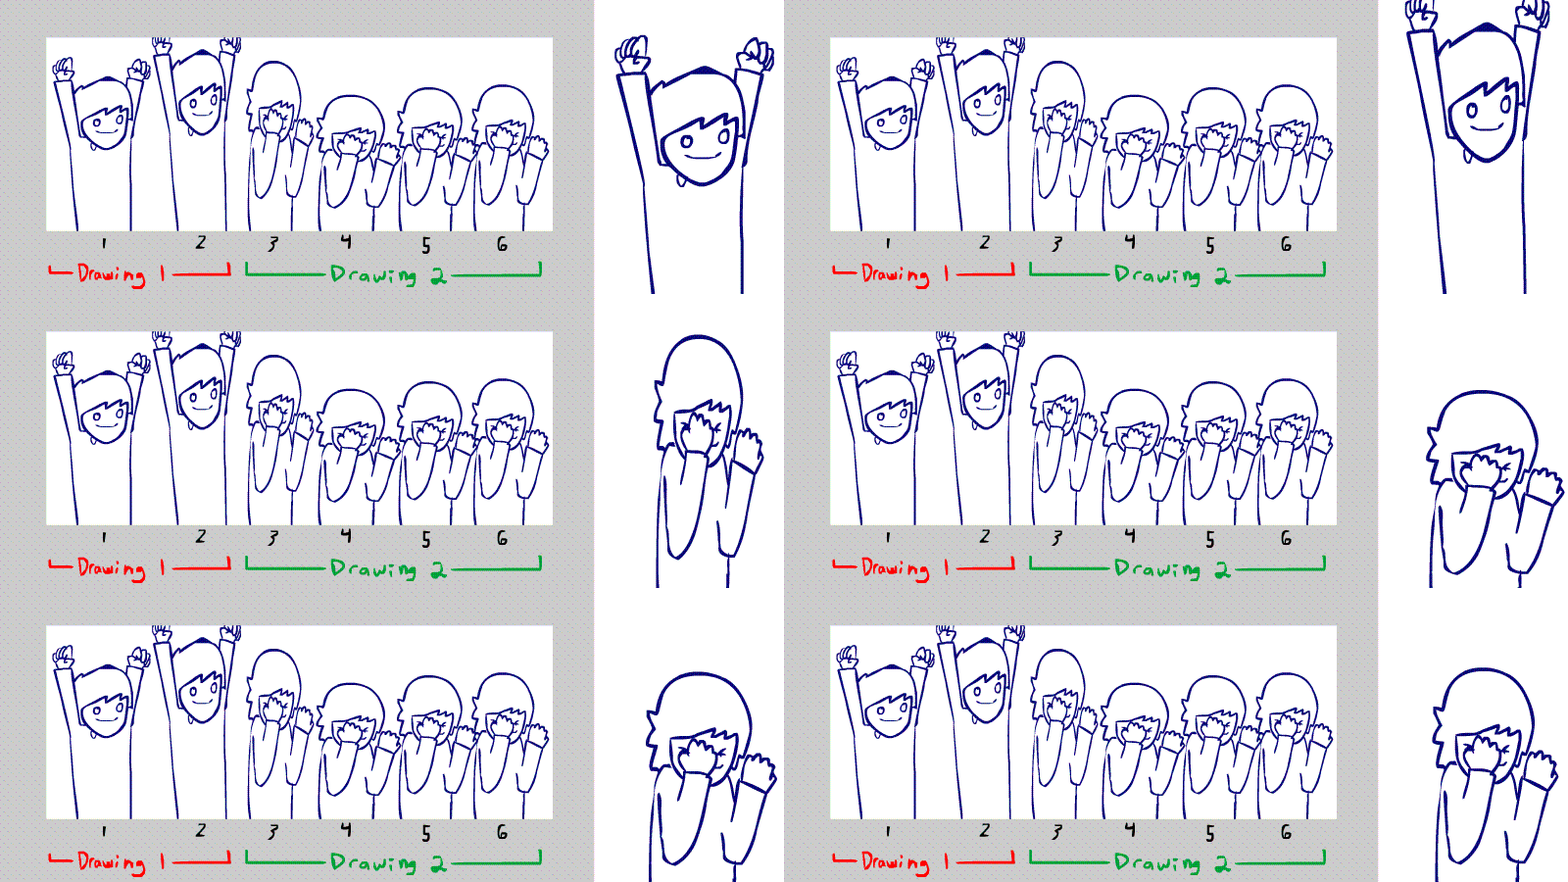
Generally, this technique doesn't allow for you to easily "clean it up" later on unless you reanimate the sequence. However, since it only requires you to draw two poses, it is often worth it to employ this technique when you are running out of time and won't be cleaning it up anyway.
3. Colour using textures
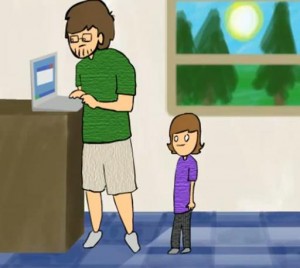
A frame from a movie using texture fills
If shading takes too long, you can make a cartoon seem less flat by creating textures in Photoshop and importing them to Flash as a bitmap fill.
I usually start by creating a Photoshop document that is slightly larger than the dimensions of my Flash movie so that I can use it without visible tiles showing where the pattern repeats. I then either use either a Render filter (such as Clouds or Fibres, which are accessed through the Filter > Render menu) or I will fill the background a solid colour and then use the Texturizer (Filter > Texture > Texturizer.)
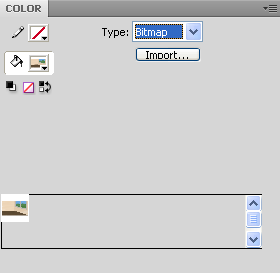
After that, it can be imported to Flash by going to File > Import > Import to Library. Next, go to the Color menu (or open it up by going to Window > Color or by pressing Shift-F9.) Change the Color Type dropdown menu to "Bitmap" and a list of your imported bitmaps should appear in the bottom of the menu. You may then select the bitmap you want, and then when you use the fill bucket, it will fill with the bitmap instead of a solid colour.
4. Shade using only two colours
Rather than spending lots of time shading normally, why not use a very small colour scheme? It looks stylized and artistic and requires a lot less effort.
A simple colour scheme employed in a video I recently made.
5. Shade using a duplicate layer
Rather than drawing shading lines on every frame, sometimes it is more efficient to use a separate layer for shading. Note: this only works without the use of motion tweens. The basic idea is this: The original layer of drawings will be duplicated, with the new layer placed on top of the original. Then, the new layer will be turned a semi-transparent black, allowing for you to go through frame-by-frame to erase parts of the shadows to make only certain parts of the drawing shaded. Here's how to do it:
- Select all the frames in the layer you want to be shaded. Right-click on them and select "Copy frames".
- Create a new layer above the drawings layer. Right-click on the first frame of this layer and select "Paste Frames".
- Turn on Edit Multiple Frames.
- Click and drag the [ and ] markers around the playhead so that they surround all the keyframes that will need to be shaded.
- Press Control-A (or Command-A on Mac) to select all the drawings.
- Open up the Colour Panel (by going to Window > Color or by pressing Shift-F9) and change the colour to black with around 30% alpha. All the drawings selected should turn black.
- Turn off Edit Multiple Frames (and optionally turn on Onion skin. For this, you should adjust the [ and ] things so it only goes around a few keyframes.)
- Go through frame-by-frame and erase parts of the black shadow to create shading.
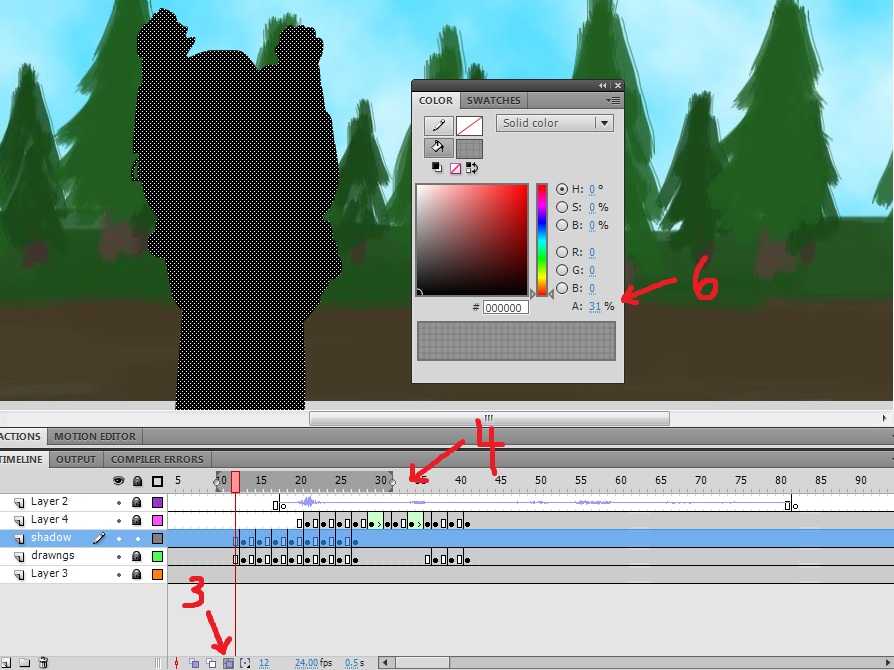
The best part of this technique is that you don't have to plan beforehand to do shading. You can just add it later, when you have time.
...but don't be lazy.
I considered calling this article "Lazy Flash Techniques", but I realized that there's a difference between being lazy and being efficient, even if it's a subtle difference. Efficiency means doing the best you can in the time given, but being lazy just means not doing your full potential. These techniques are supposed to be time-savers when working under a deadline. If there's no deadline, just do what you need to do. Don't cut corners if there isn't a need. But hopefully, when the time comes that being quick comes in handy, some of these strategies may help.
</david>
